Adsterra is known as an easy-to-use advertising network working with high-converting ad formats: popunder, social bar, banners, in-page push, native and video ads.
Let’s see what is under the hood of Adsterra.
Adsterra in Numbers
- 8 years in the affiliate industry;
- 30,000 + partners;
- 20,000 + campaigns running simultaneously;
- 1, 000,000,000 impressions daily;
- 20 targeting filters;
- up to 15 creatives for each A/B test;
- 248 GEO;
- 3-level security.
Apart from these numbers Adsterra has managed to grow into an extensive network with the tailored payment options, in-house anti-block system, 24/7 multilingual live-chat support and even personal insights about the most effective ad format and/or settings as the part of the Partner Care approach.
Let’s see how you can start working with Adsterra.
How to Start With Adsterra
To start you will need to register an account on the side of Adsterra.
You can register as an advertiser, publisher or as an affiliate.
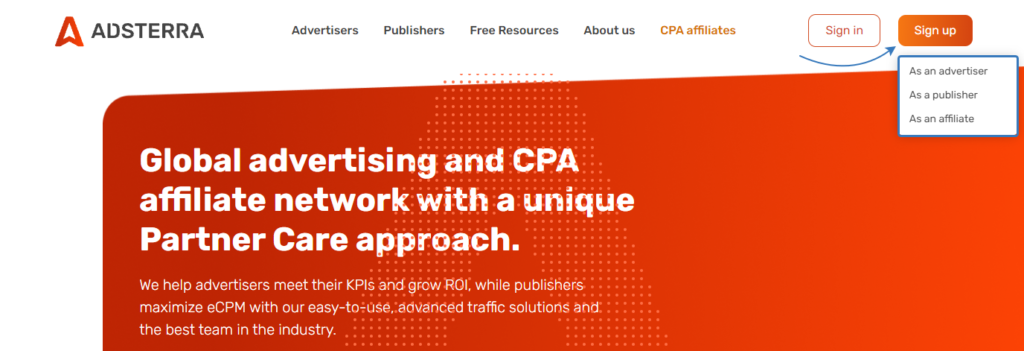
If you’re willing to buy traffic from Adsterra to monetize it through your offers, you need to select “Sign up as an advertiser“.
To sell traffic from your website, application, Facebook page or other traffic source, you will need to register as a publisher.
Adsterra has recently started to work as an affiliate network. You can register as an affiliate to access the profitable and exclusive CPA offers from Adsterra affiliate network. The guide with the review will also appear in our blog soon.
For now we will describe the part which relates to an advertiser account with Adsterra.
When signing up with Adsterra you will need to complete the regular form with login, name, password, messenger, select your role in the affiliate industry and type of traffic model.
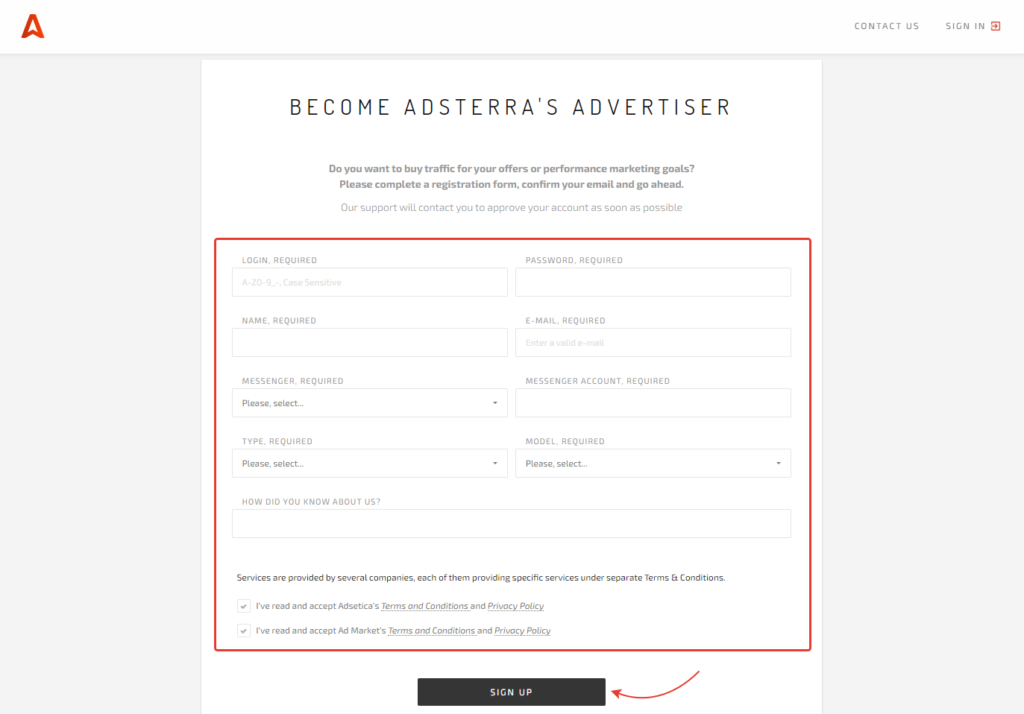
To start running your ads you should add funds on the account balance.
Enter promo code DB1EGSTN and add $300 on your balance. You will receive a $100 bonus, if you create a new account with Adsterra.
Now you can select the targeting options on the side of Adsterra. This is required to narrow the audience.
Here you can also choose the ad format that suits you that best. In addition to the standard Popunder, Native Ads, Banners, Direct Link and VAST video, Adsterra recently updated their customizable Social Bar.
This In-page Push and Display Ads combo format already showed 10-30 higher CTR then classical Web Push. With the update it also gives you access to over 20 CTR-boosting templates that proved to convert. And if that’s not enough — you could always. The team will be glad to share the insights and help you with selecting the best targeting options.
After you finish setting up the targeting options, you can go back to your BeMob account to create a campaign.
BeMob Settings
As Adsterra is already listed in BeMob templates all the required fields will be completed automatically when this traffic source is selected.
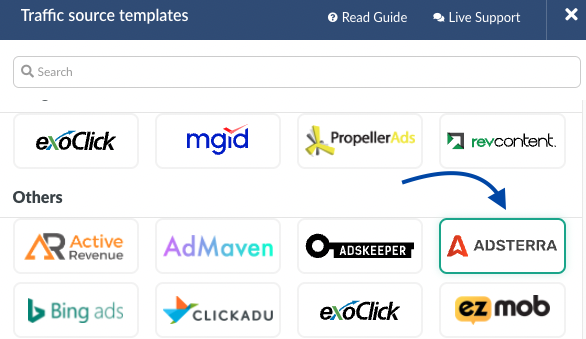
To add Adsterra from templates:
- Press Traffic Sources.
- Click on New from Template

3. Select Adsterra
Postback Settings
Once Adsterra template appears you will see that the configuration window is divided on 2 parts: Traffic source details and Parameters.
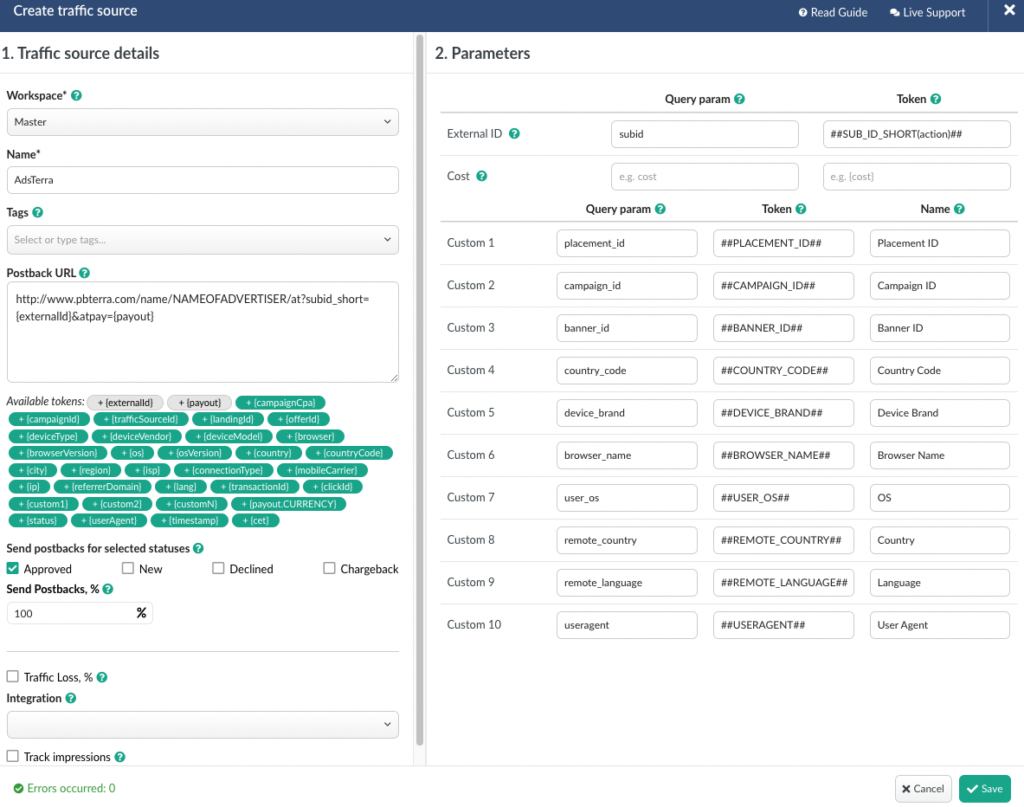
Part 1 with traffic source details contains the postback settings.
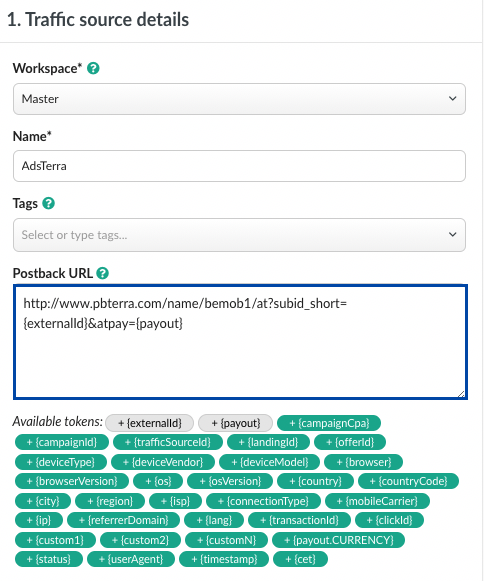
The Adsterra pre-configured postback on the side of BeMob looks the following way:
http://www.pbterra.com/name/NAMEOFADVERTISER/at?subid_short={externalId}&atpay={payout}
NAMEOFADVERTISER should be replaced with the name of advertiser which can be found on the side of Adsterra.
Our account name on the side of Adsterra is bemob1. Then the postback URL on the side of BeMob will be look the following way:
http://www.pbterra.com/name/bemob1/at?subid_short={externalId}&atpay={payout}
At this point all the obligatory postback settings are finished. The last but not the least – make sure the Approved checkbox is marked.
The postback settings of Adsterra on the side of BeMob should look the following way:
Parameters
The list of parameters and tokens supported with Adsterra is already preconfigured in the template.
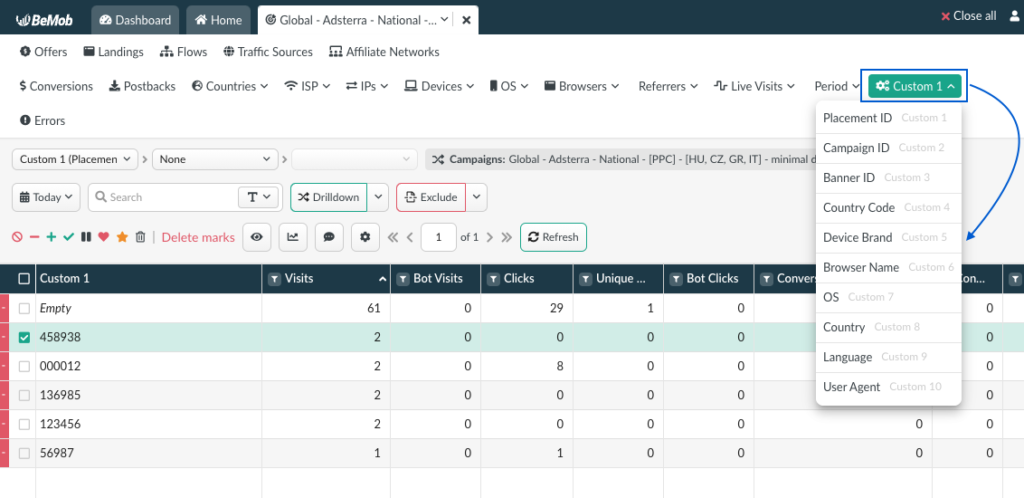
These parameters and tokens are required to transfer the additional details on traffic to your report in tracker, e.g. placement IDs, campaign IDs, banner IDs etc.
If you pass the data on conversions to the Adsterra side, make sure that External ID field is completed.
All the tokens available with traffic source settings will be automatically added at the end of Campaign URL once you select Adsterra in campaign settings.
The data will be available in report on Custom parameters and can be used for further optimization and targeting of your campaigns.
Campaign Settings
After Adsterra is added from the templates, the campaign can be created in tracker.
- Press Campaigns tab.
- Click New.

- Specify the name of your campaign.
- Select Adsterra as Traffic Source.
- Select CPV cost model and specify cost value.
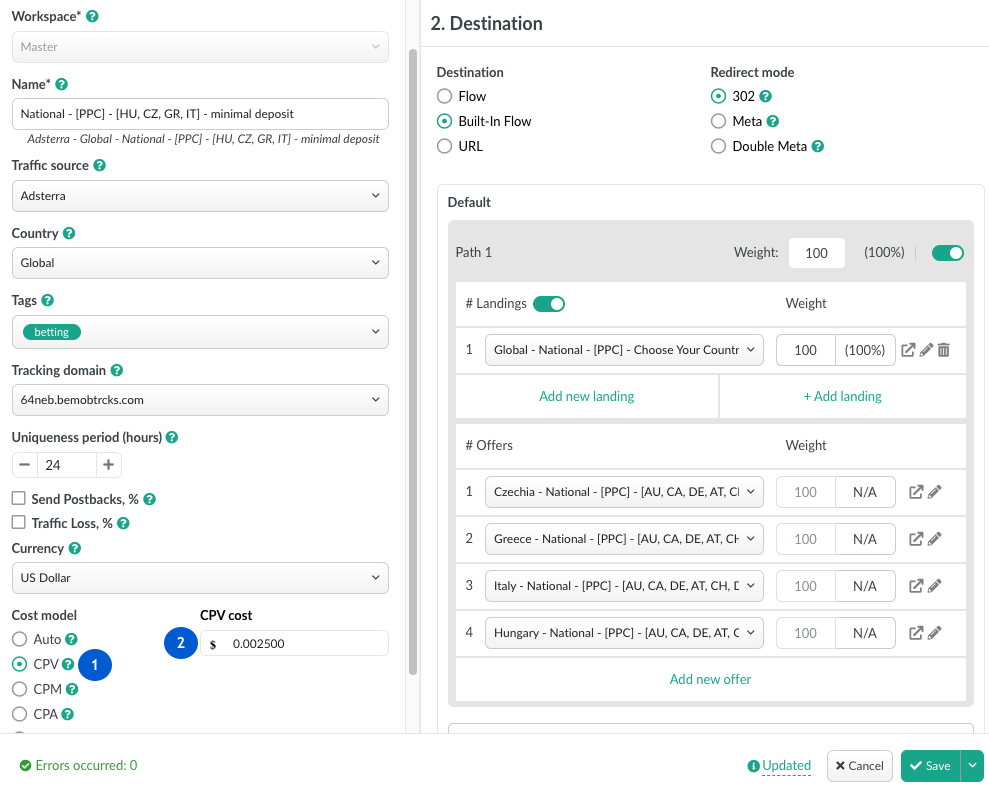
💡 It is possible to select another cost model in the campaign settings depending on your requirements, but make sure you specify the cost value in the appeared field.
6. In Destination section it is required to select one of three options: Flow, Built-In Flow or URL.
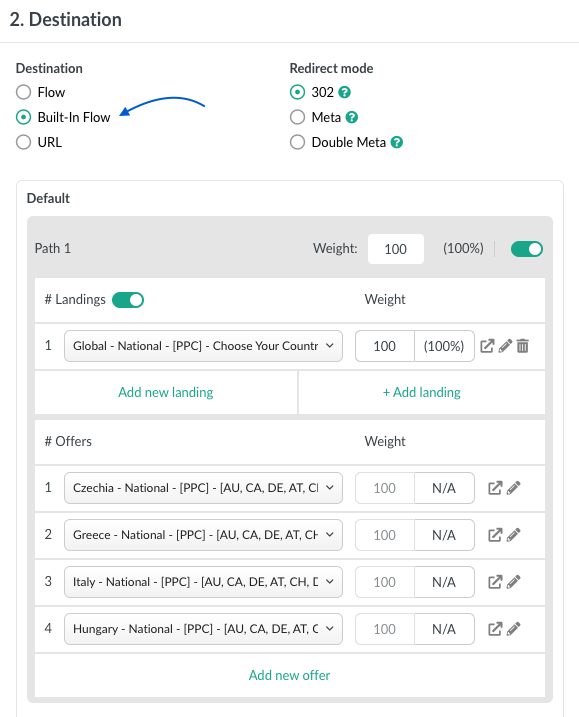
After you press Save to store the campaign settings, the window with the campaign links will appear.
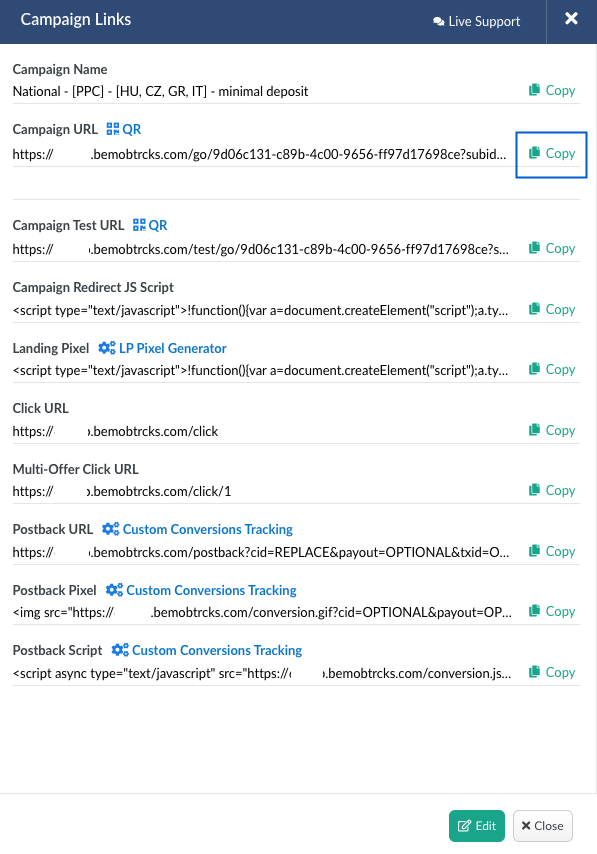
The link you should place on the side of Adsterra is Campaign URL.
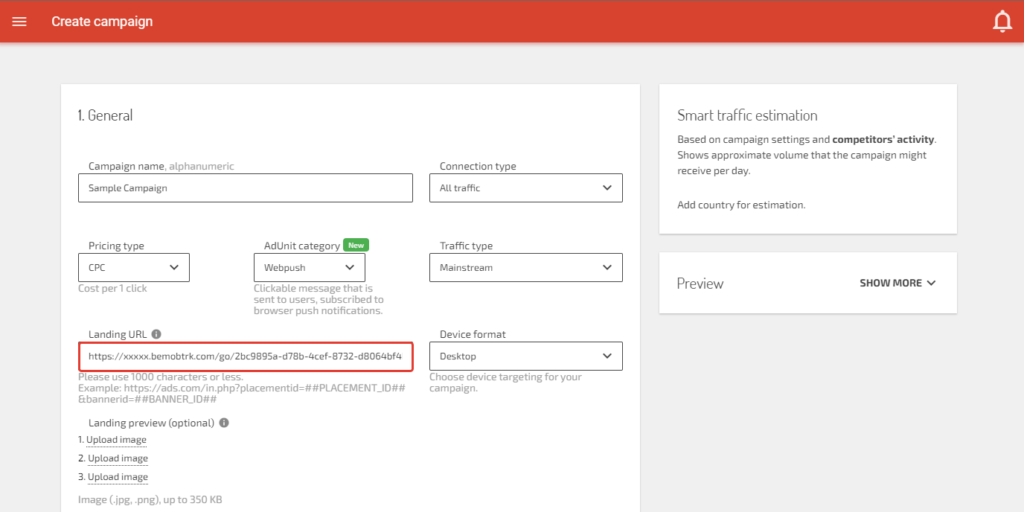
After your campaign is approved on the side of Adsterra, you can start driving traffic to your campaign and track all the data with BeMob.
Now when your campaign with Adsterra becomes active and your offers start receiving traffic, the optimization part should start.
Analyzing the reports is essential for optimization.
No assumptions should be made based on a couple of clicks. Let the traffic go to your offers for some time.
The optimization part will be covered in our next guide.
For now good luck and high ROI!


 English
 Русский
 Español