
 Русский
 Español
 中文
中文
In the dynamic landscape of affiliate marketing, staying ahead requires more than just running campaigns – it demands a nuanced understanding of your data. In this blog post, we delve into a powerful tool poised to transform your approach to analyzing and customizing reports — Presets.
Let’s unlock the full potential of your campaign data and chart a course towards greater success!
The Essence of BeMob Presets
As any seasoned marketer knows, raw data is just the beginning. It’s the ability to extract meaningful insights and tailor your reports to your unique needs that truly sets you apart. BeMob Columns Presets takes reporting personalization to the next level, offering sets of preselected columns that are used to empower you with the exact information you need, when you need it.
A preset in BeMob is essentially a template containing preselected columns that streamlines your data viewing process. This feature proves invaluable if you frequently adjust column arrangements in your reports. By utilizing presets, you can focus exclusively on the metrics essential to your analysis, thereby saving precious time in your reporting endeavors.
The beauty of presets lies in their ability to eradicate the repetitive task of adding or removing columns. Once you’ve customized and saved your preferred column set, you can effortlessly select it whenever needed, eliminating the hassle of manual adjustments every time you access your reports.
Types of BeMob Presets
BeMob provides two distinct preset options: General and Custom.
General Preset
Upon registration with BeMob, your account is automatically equipped with the General preset. This preset encompasses a predefined set of default system columns, meticulously curated to align with the common needs and preferences of our clients. It is non-deletable and non-renamable.
Despite being a system preset, General offers flexibility, allowing you to modify both the set and order of the included columns. You can add or remove columns, rearrange columns order, and restore the default state of the preset.
Additional details about the Columns Settings are available in our dedicated guide.
Custom Preset
This preset type is created by your own according to your preferences. You are the one who selects the columns you want to have for a particular report.
The custom preset can be renamed or deleted. As for its columns, you have the ability to take various actions, including adding or removing columns and changing their order.
Custom presets can be created for the reposts available under the Home section.

❗️ All drill-down reports have a General Preset only.
Preset Configuration & Managing
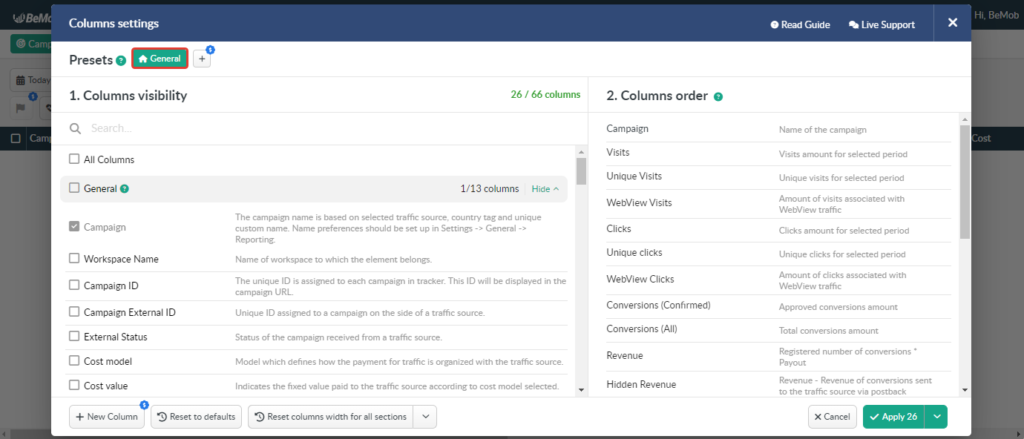
Creating a preset involves clicking the eye icon on the right side of the panel, then pressing the + button in the Columns settings window, specifying a preset name, and finally pressing the Save button.
Once you’ve created a custom preset, you can include the necessary columns by ticking their names on the left side of the Columns settings window. The selected column names will instantly appear on the right side of the settings window.
You can perform the following actions with presets: editing, deleting and switching between them.
Click on the ✏️ icon to enter the editing mode. This action allows you to modify the preset name. Feel free to type in the new name that aligns with your preferences.

To remove or add columns, uncheck or check their names on the left side of the Columns settings window, respectively.
If you wish to delete a preset, navigate to the list of available presets, click on the name of the preset you want to remove, and press the Delete button.
To identify the currently used preset, click the V next to the eye icon and expand the list of available presets. The preset currently selected for the reports will be highlighted in green.

Switching a preset is as simple as selecting the desired one from the list. The changes will be automatically applied within a second.
❗️ Switching between presets is not available inside a drill-down report.
Cost and Availability
The General Preset is accessible to all BeMob users at no cost. However, the availability of creating a custom preset depends on your pricing plan.
If the Presets feature is not included in your plan, you can purchase it as an addon to your current plan. An upgrade to a higher pricing plan will not be needed in this case.
To find out which features are already included in your pricing plan, go to the Settings → Plans Description tab.
Buying
To purchase the Presets addon, navigate to the Subscription tab. Find the Presets addon in the Advanced options section and click the Buy button.
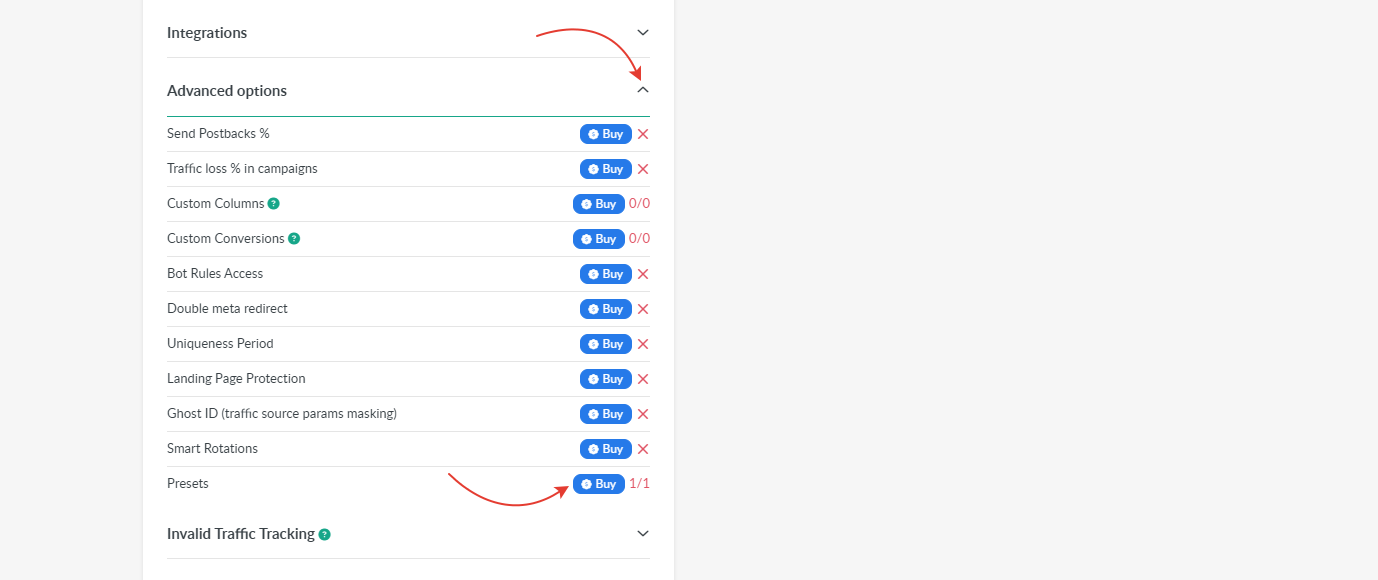
❗️ You have the option to purchase and create a maximum of 4 custom presets.
In terms of the Multi-User Access option each teammate (an account owner, a user, an admin) can create up to 4 custom presets.
Switching Off
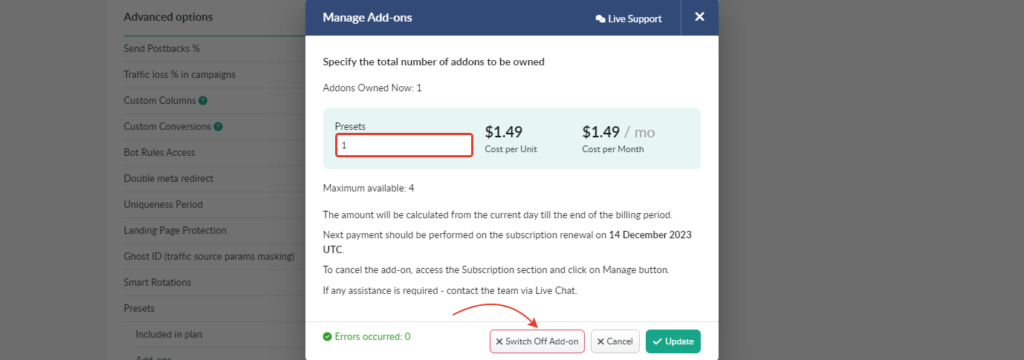
To deactivate the Presets option for your account, click on the Manage button.
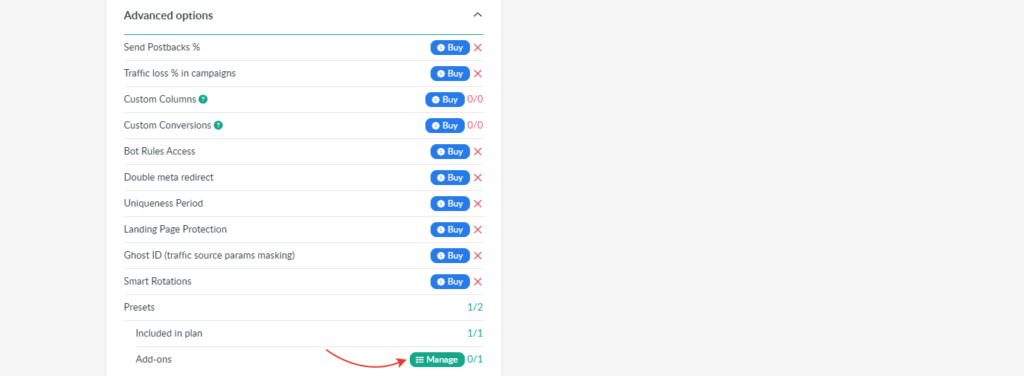
In the appeared window, indicate the number of presets you wish to cancel, and then press the Switch Off Add-on button.
The remaining amount from the initially paid sum will be credited to your BeMob account balance and can be utilized for future purchases.
Learn more about BeMob subscription management in this guide.
The Presets emerge as a powerful tool for personalizing reports to meet your preferences and specific analytical needs. The utilization of presets offers a user-centric approach to data presentation. By creating and customizing presets, including the ability to add, remove, and rearrange columns, your reporting experience becomes highly tailored.
Embracing the potential of presets opens the door to a more intuitive and personalized reporting experience, ultimately driving informed decision-making and maximizing the utility of data-driven insights.
Don’t hesitate to contact us for any questions or assistance through our live chat or email at support@bemob.com. Our dedicated support team is here to help and is always at your service.